ACES 1.3 vs Linear to sRGB
Prior to using wide gamut workflows in cg software, pretty much everyone used linear to sRGB, where the incoming images were set to linear/ungamma corrected for rendering, the final output was only in sRGB.
In more recent years people have adopted outputting and rendering in wide gamut colorspaces including DCI P3, and ultimately ACEScg, which has been established as a standard.
ACES 1.3 introduces a broader set of colorspaces for converting from various digital camera color gamuts to an ACES working space, allowing you to unify background plates with cg renders in a colorspace that’s large enough to encapsulate both.
You can download the latest OCIO configs here: OCIO configs
You can use the configs above by loading them into Maya. Go to Windows > Settings/Preferences > Preferences > Settings > Color Management and Enable Color Management.
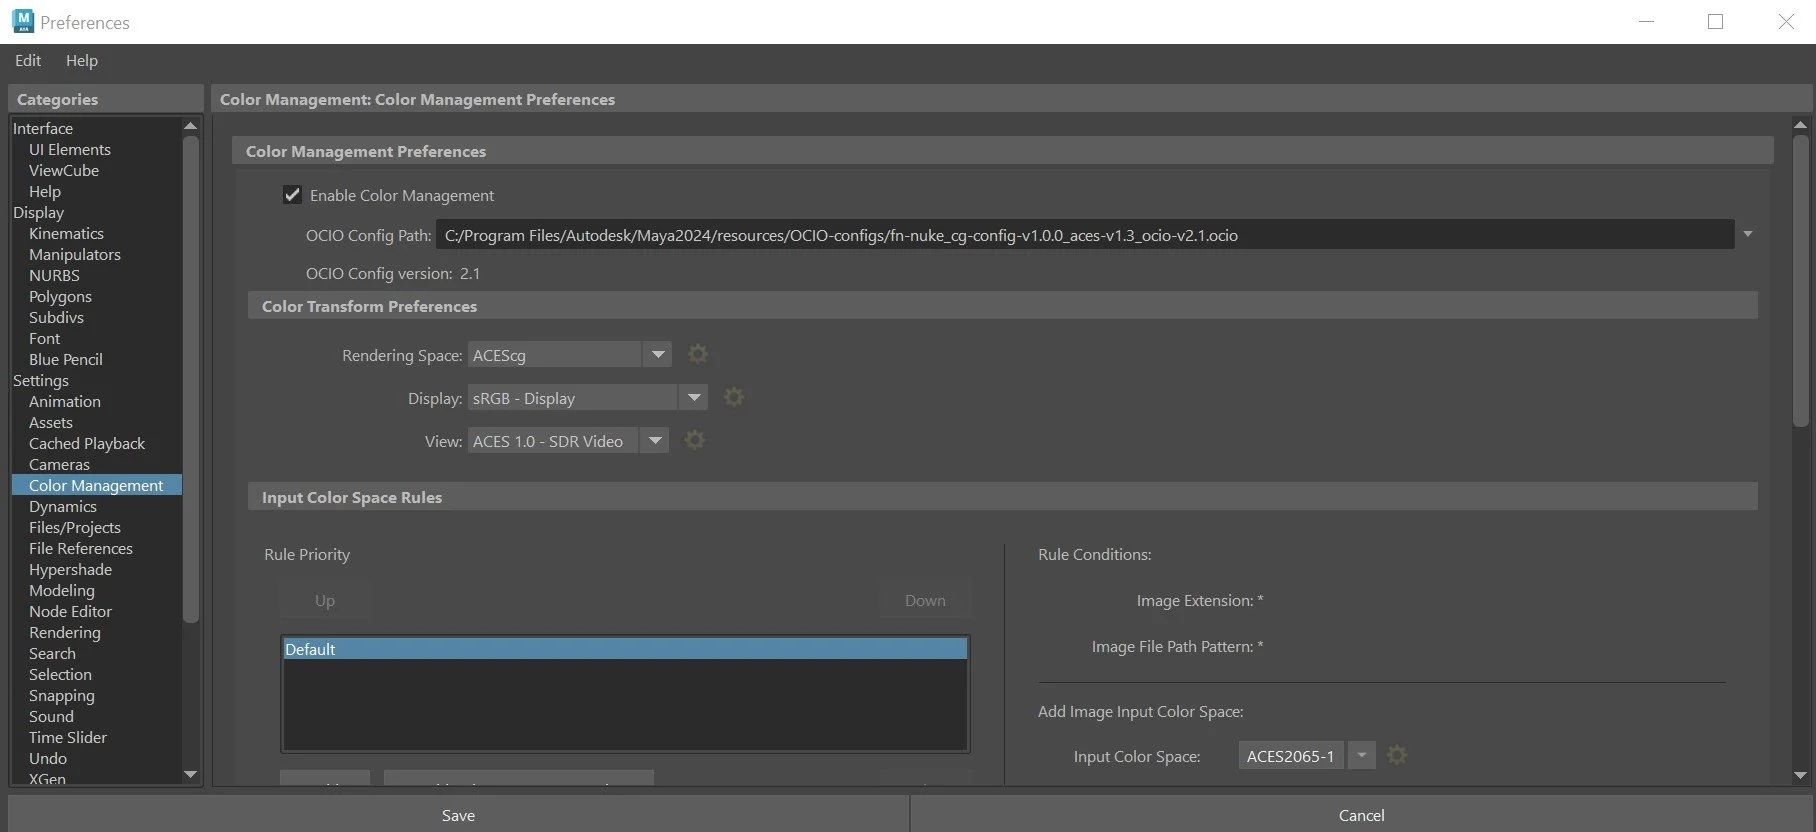
Load cg-config-v1.0.0 aces-v1.3_ocio-v2.1.ocio
Linear to sRGB vs ACES
The main question is: why use ACES? Below I’m going to showcase some comparison images of the traditional Linear to sRGB workflow vs using ACEScg.

Here’s a typical sRGB render. Note the clamped look in the green wall and overexposed highlights that lack recoverable detail. I’m viewing this in the normal Nuke color Profile, with Linear to sRGB conversion, where the incoming Read is Linear and the view transform in the Viewer is sRGB
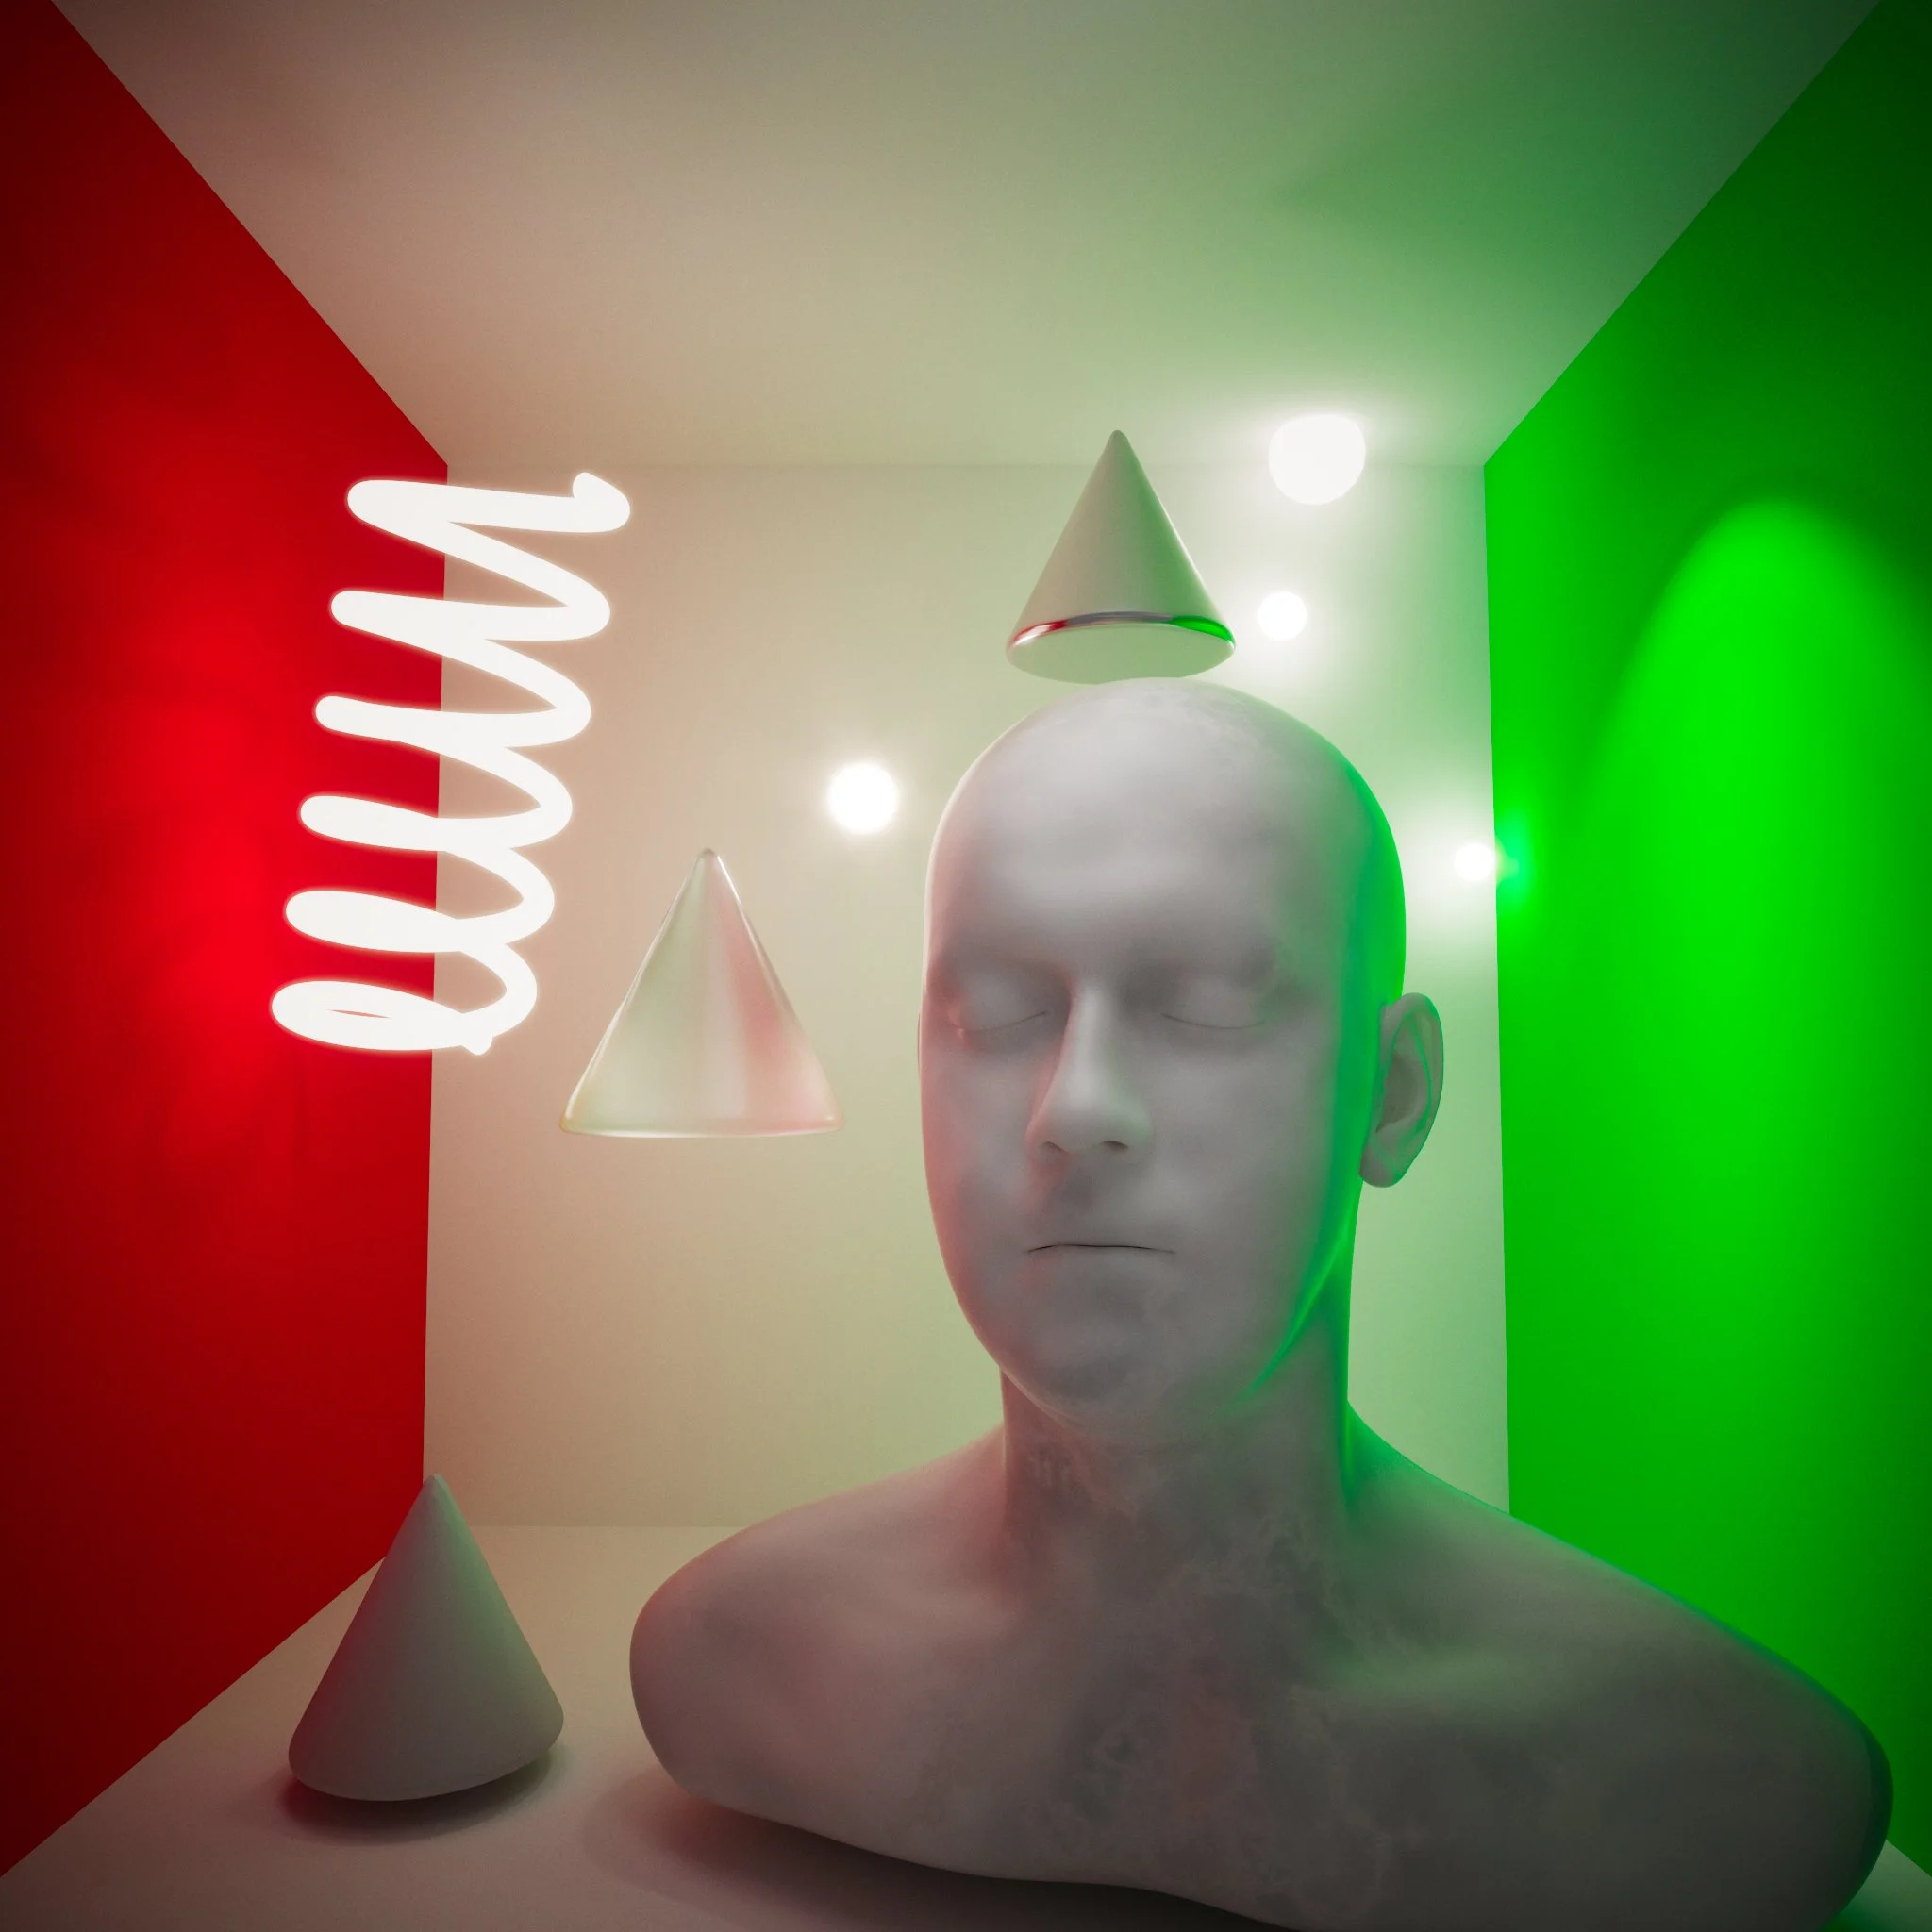
This is an ACES image, saved from the VRay framebuffer with Save in Image. Notice the far superior highlight control.
ACES 1.3 in VRay
There are a few minor changes in how VRay behaves with the new ACES 1.3/OCIOv2+ config file. I want to use this config to match the transforms 1:1 with Photoshop and Nuke. Photoshop in particular ships with ACES 1.3 now.
In the VRay framebuffer, there’s an option called Save in Image. As of ACES 1.3, this now will convert the framebuffer image to sRGB. Previously in ACES 1.2/Maya 2022 default config this would only apply a view transform to view the ACEScg data in Nuke. You would then need ‘bake’ in the View Transform by using color_picking(sRGB) in the Write node.
For ACES 1.3, we have 2 options: use Save in Image, and write out a .jpg or .png with no transform, or uncheck Save in Image in the VRay Framebuffer and apply the View Transform in our Write Node.
If Save in Image is Off
If save in Image is off, we need to apply a viewing transform to the image to get the ACES data into a format that can be saved as an 8 bit image. The goal in this case is to show you how to go from a high dynamic range ACEScg render out of VRay to an image that can be uploaded directly to the web, or viewed on any sRGB device(basically any screen made that isn’t an HDR tv or high end grading monitor).
Note the following settings:
View transform in the Viewer is set to ACES 1.0 - SDR Video
The Read node is set to scene_linear(ACEScg)
The Write node is set to transform type - display, display - Rec. 709, view - ACES 1.0 - SDR Video
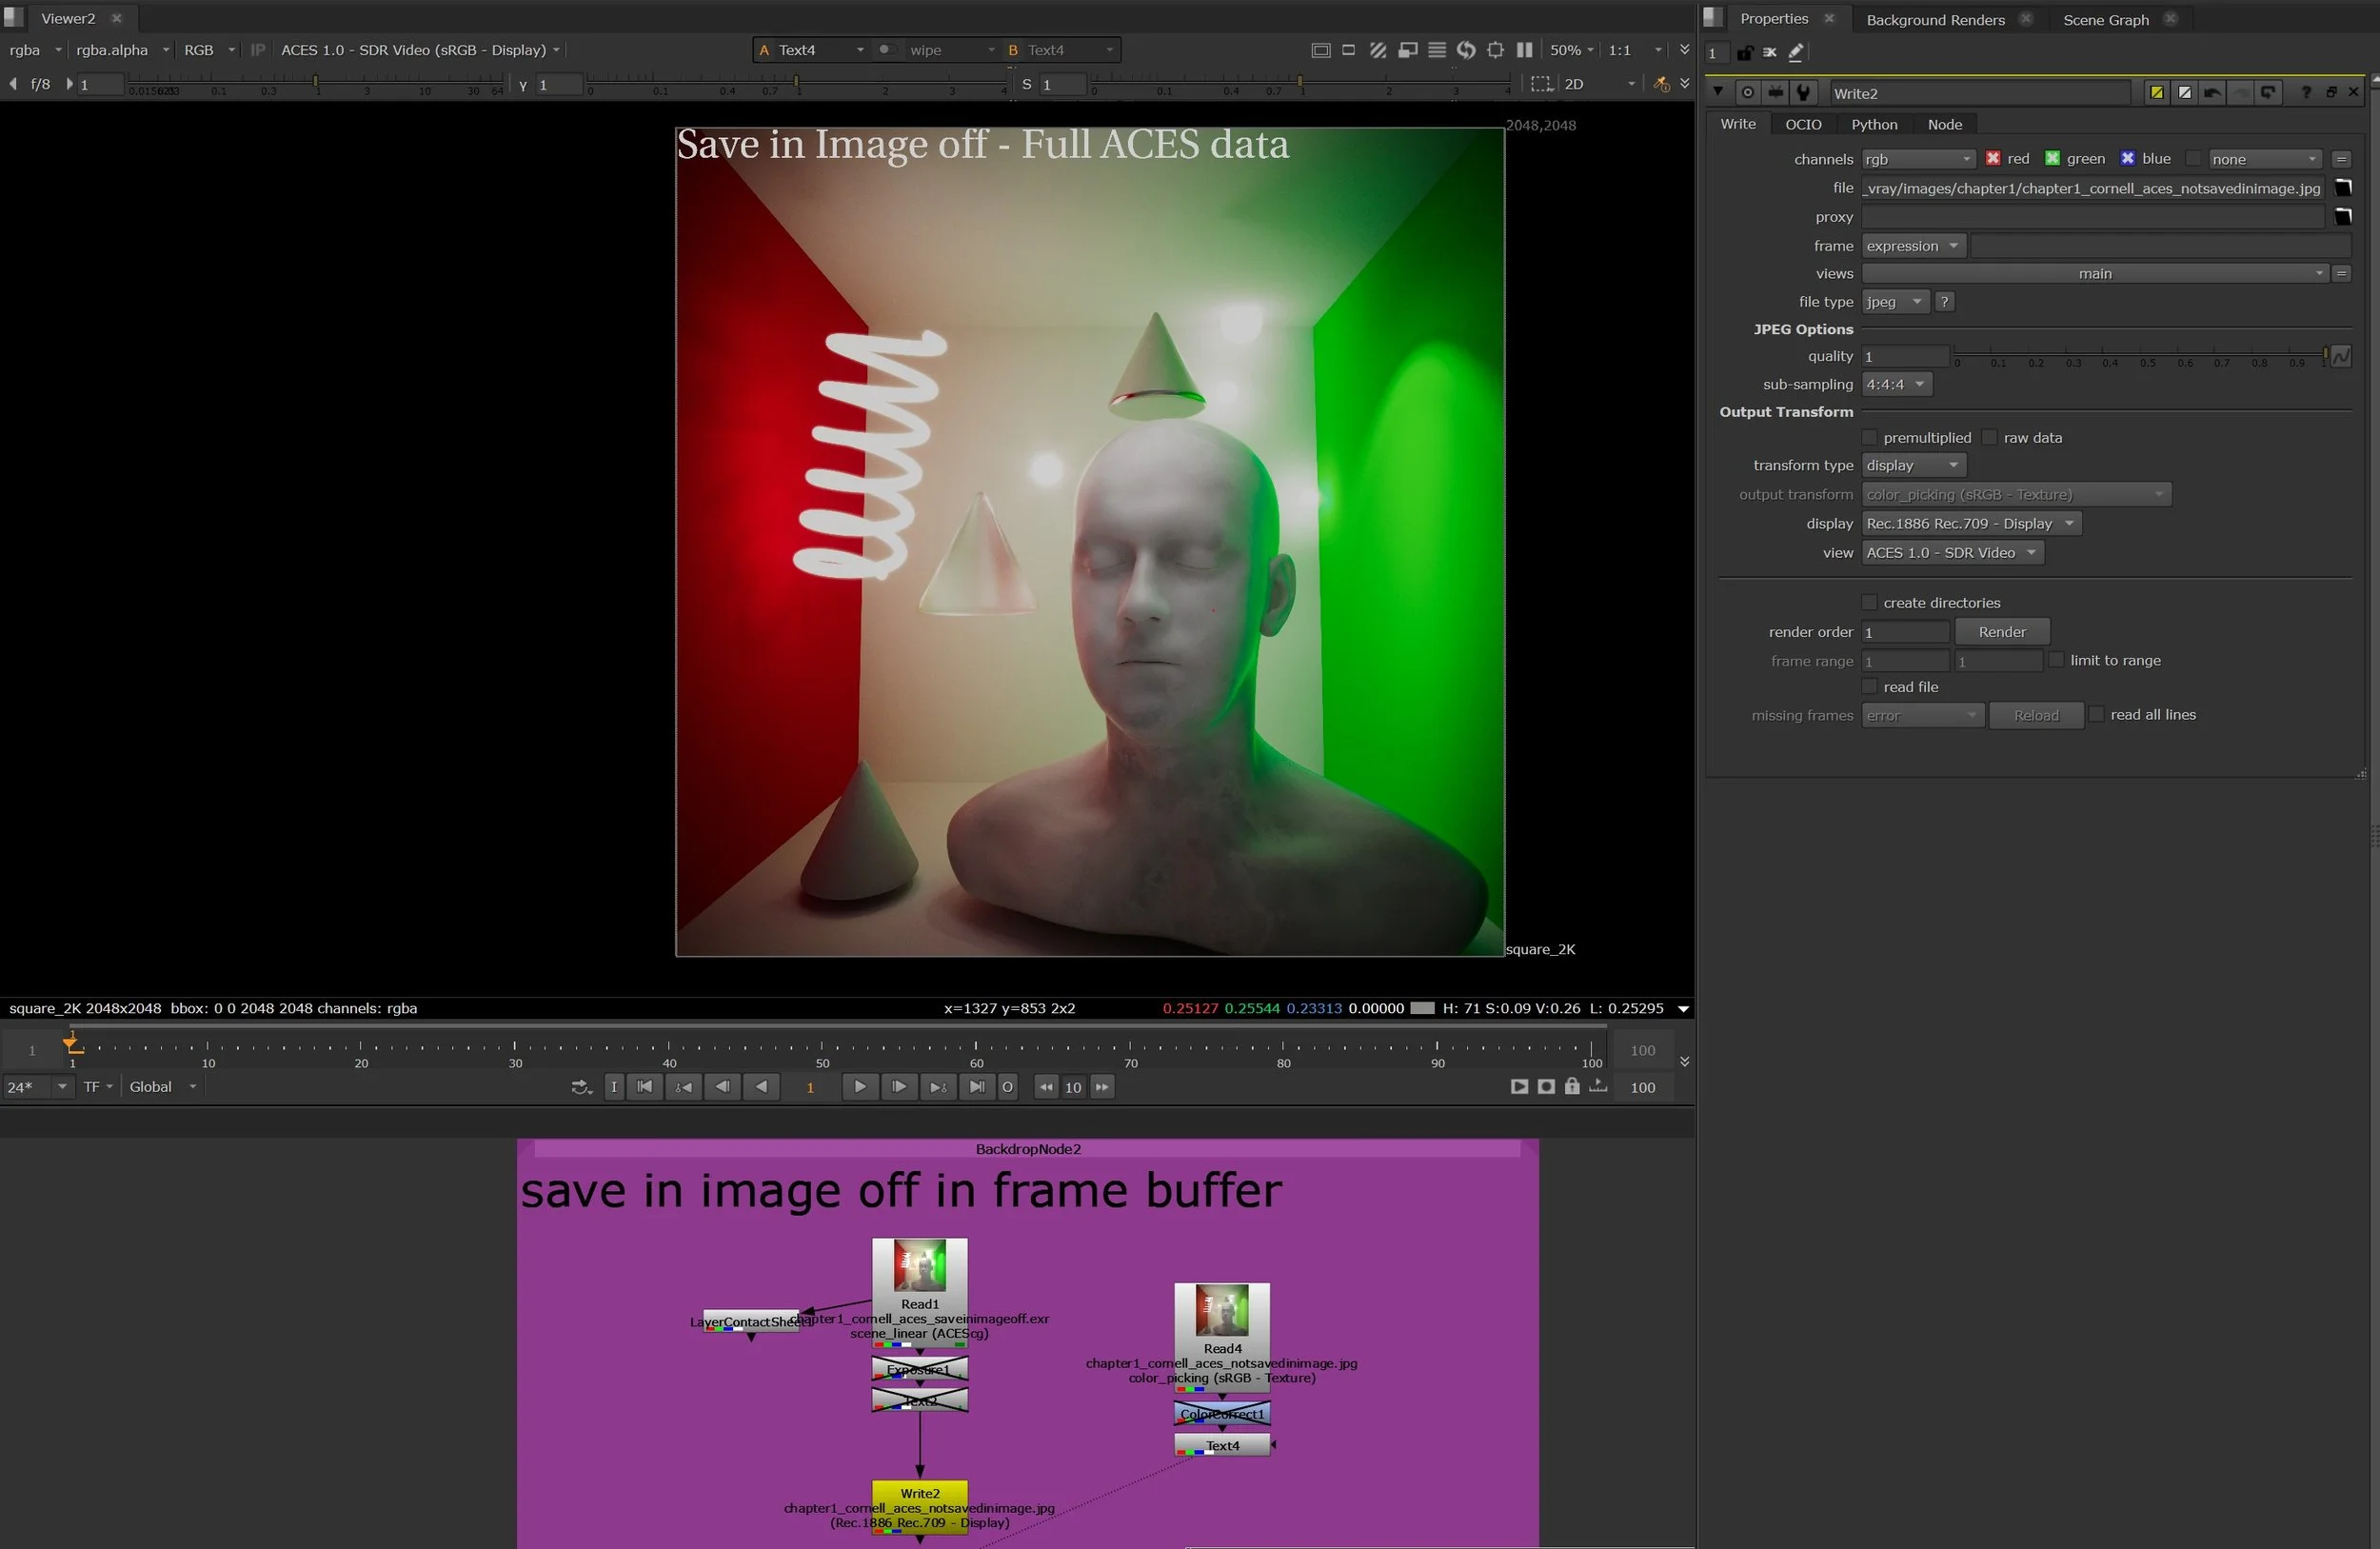
If Save in Image is off in the VRay framebuffer, we need to bake in the view transform and convert to sRGB correctly when writing an 8 bit sRGB image like a .jpg or .png.
If Save in Image is On
If Save in Image is checked on in the VRay framebuffer in ACES 1.3, then we’ve already converted it to an 8 bit image. This isn’t ideal for heavy post work, but is fine if you want to quickly convert an image for web. You can save an .exr with this checked on to preserve your rendered channels, but note they will be in 8 bit colorspace format, and lack some color depth as a result.
Note the following settings in Nuke:
The View Transform is set to Raw(sRGB Display). We no longer need a viewing transform because we already converted the image with an sRGB viewing transform baked in.
The Read node is set to scene_linear(ACEScg), as that’s the source. This will interpret correctly.
The Write node is set to Data(Raw). Again there’s no need to write out a view transform since we already baked it in from the VRay framebuffer.
If Save in Image is on, we view the data as Raw and don’t apply a transform, as that’s already been done in VRay.
Image output compared
Below I compare the 2 results. Essentially if you want to maximize the image quality, dynamic range, and color fidelity in ACES 1.3, turn off Save in Image and VRay. With this turned off you can see there’s better highlight retention, and more latitude in the color. Below I’m comparing my 2 renders and desaturating them a bit to better illustrate the differences.
2 save methods compared. For best results, keep Save in Image Off in ACES 1.3. Not there’s a minor exposure or gamma difference, but we have much more tonal range. Just for comparison sake, I desaturated the image 50% so you can see the difference in color retention, especially the green wall on the right.
Wrap Up
Note that there’s a gamma difference here. You can easily compensate for this with some minor grading tweaks. The image on the left, which is saved without the VRay view transform has even greater color fidelity. You can see more range in the highlights on the red wall in particular.
I haven’t fully figured out why this difference is occurring - it could be a minor difference in tonemapping, gamma correction, or something else being applied by the VRay framebuffer behind the scenes.
If in doubt, use ACES 1.2 and the Maya 2022 default ACES config.